When accuracy isn’t allWhen accuracy isn’t all
When it comes to radio system measurement, there actually are three other important aspects — precision, reliability and traceability.
March 1, 2012

Metrology is the science of measurement and calibration is the means by which we ensure that the measurement is accurate. In land-mobile radio, we rely heavily on test instruments that are assumed to be accurate and consistent. These instruments include service monitors, spectrum analyzers, power meters, network analyzers, cable analyzers and multimeters. Proper and regular calibration is our insurance against inaccurate or unreliable measurements.
The markers of a good measurement. The four most important features of a good measurement are accuracy, precision, reliability and traceability.
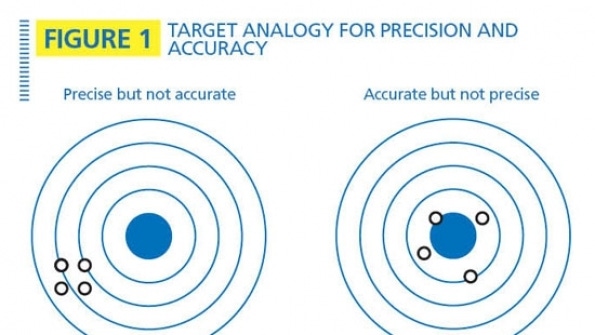
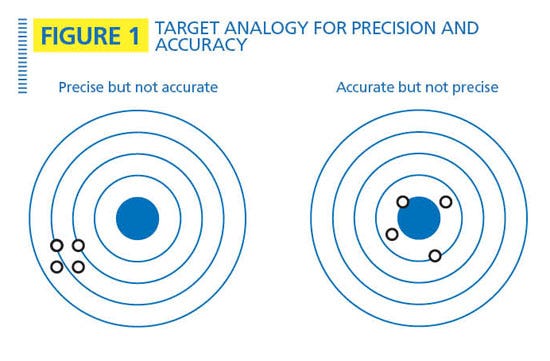
Accuracy defines how close the measurement compares to the standard. It is different than precision, which measures how close repeated measurements are to each other. One way to illustrate this difference is to use the target analogy shown in Figure 1, where the tight grouping on the left indicates good precision and poor accuracy while the grouping on the right indicates good accuracy and poor precision. In electronic measurement, an instrument with a bias error might achieve good precision after averaging a large number of samples, but the bias error always will result in poor accuracy.

Reliability and repeatability sometimes are used interchangeably. For our purposes, reliability indicates the consistency of the measurement over time. Most spectrum analyzers with tracking generators, for example, have only mediocre amplitude reliability when compared with a power meter or network analyzer.
Traceability refers to the validation of the measurement against the standard. Traceability is especially important for equipment used to perform calibrations. In the U.S., most calibrations are traceable to standards maintained by the National Institute of Standards and Technology (NIST), formerly the National Bureau of Standards.
Standards. A standard is usually a device with known correctness by which other devices are compared. The meter is an example of a standard. The French invented the meter in the 1790s and defined it as 10-7 times the distance from the equator to the North Pole along a meridian through Paris. This definition was translated into the distance between two marks on an iron bar kept in Paris. Later, the International Bureau of Weights and Measures (BIPM) replaced the iron bar with one made of 90% platinum and 10% iridium. Because metal expands and contracts with temperature, the BIPM added a standard temperature, pressure and humidity to the standard. In 1984, the Geneva Conference on Weights and Measures redefined the meter as the distance light travels, in a vacuum, in 1/299,792,458 seconds with time measured by a cesium-133 atomic clock which emits pulses of radiation at rapid, regular intervals. So, the standard meter was originally a device (an iron bar), but is now a parameter (time) measured by a device (a cesium-133 atomic clock).
Frequency standards also are defined by radioactive decay. In the U.S., NIST maintains several frequency standards based on atomic clocks. The Global Positioning System (GPS), which is a standard in itself, employs dozens of atomic clocks with multiple clocks on each satellite.
Standards have measurement error, too, but the standard should be significantly more accurate than the device being calibrated. As a practical matter, the standard should have less than 1/4 the measurement uncertainty of the device being calibrated. When this goal is met, the accumulated measurement uncertainty of all of the standards involved should be insignificant.
More on traceability. The BIPM defines traceability as “the property of the result of a measurement or the value of a standard whereby it can be related to stated references, usually national or international standards, through an unbroken chain of comparisons, all having stated uncertainties.” In other words, traceability is the methodology used to calibrate various instruments by relating them back to a primary standard. In the U.S., these standards are maintained by NIST and the sign of a good calibration is the phrase “Traceable to NIST” on the calibration sticker.
Measurement uncertainty. No measurement is 100% precise and there is some error associated with every measurement. Quantum mechanics tells us that the very act of measuring introduces uncertainty, so even a perfect world would have imperfect measurements. Analysis of measurement uncertainty requires probability and statistics, which is a subject for another day. But even with a calibrated instrument there is room for improvement. First, we should be diligent about using the instrument’s self-calibration (sometimes called alignment) which helps with measurement reliability. Also, if there is no bias error in the instrument, averaging a large number of samples will reduce the measurement uncertainty. There are also sources of uncertainty outside of the instrument. If the component being measured is not stable, then the measurement will show poor reliability through no fault of the instrument.
Test equipment specifications. To the consternation of engineers, salesmen help develop the data sheet for test instruments. This leads to the usual problems of specifying dB when it should be dBm, etc., but the salesman also is concerned that each of his specifications are as least as good as his competitor’s. This leads to some “specsmanship” where the specification does not mean what the user might think.
For example, spectrum analyzer manufacturers often specify the “dynamic range” (a misnomer) as the difference in dB between the strongest signal the instrument can measure without gain compression (the 1 dB compression point) and the displayed average noise floor. The tricky part is that the average noise floor is directly proportional to the resolution bandwidth, so two analyzers with identical noise figure but different minimum resolution bandwidth will appear to have different “dynamic ranges” when in fact they have the exact same ability to see weak signals.
Another area of frustration is measurement uncertainty. Manufacturers often will specify an amplitude error of say 1.5 dB, with no further explanation. Naturally, we want to know whether this is the standard deviation, 95th percentile or what? Also, what is the repeatability of the measurement? Does it drift by more than a few tenths of a dB in an hour? Rarely are these questions answered in the data sheet.
Calibration. Strictly speaking, calibration is a comparison between a measurement and a standard. The purpose of calibration is twofold: to verify the accuracy of the test instrument and to adjust the instrument so that measurements fall within a specified tolerance around the standard value. Calibration schedules are important, but they rarely are tailored to the instrument as they should. The calibration shop typically specifies a one-year calibration cycle. There is no inherent aging in the instrument that dictates a one-year calibration period. In fact, modern instruments have few components vulnerable to aging (with the important exception of the crystal oscillator). Instead, the calibration history of the instrument and its use should drive the calibration schedule. If the instrument consistently calibrates at the same level with no adjustments year after year, then one should consider extending the calibration period to save costs. On the other hand, if large adjustments are made during each calibration, or the instrument gets rough handling, then a shorter calibration period may be warranted.
Jay Jacobsmeyer, KD0OFB, is president of Pericle Communications Co., a consulting engineering firm located in Colorado Springs, Colo. He holds bachelor’s and master’s degrees in electrical engineering from Virginia Tech and Cornell University, respectively, and has more than 30 years experience as a radio-frequency engineer.
More from Jay Jacobsmeyer


